
Patio to Catio/Patio Craft Room Makeover
Patio makeover time!! We are changing our enclosed patio into a Catio and a craft room.
I am so excited to share our first makeover or space overhaul with you. We had made this patio area just a catch all for anything and everything. You see the previous owners had enclosed the patio with 3 sliding doors and some wood. That’s all they did, not even paint on the wood.
They left the stucco wall the same color of the outside of the house. Who would do such a thing? Just kidding, a lot of people would. Not me I just can’t take it anymore. My belief is if you can paint it then paint it.

I love to paint. It is a stress reliever to me. Plus paint changes the look of an area without spending a lot of money. I can just go on and on on the subject of paint. I’ll let you check out my post on paint and I’ll get back to my patio makeover.
Catio or Patio
You read that right. It does say Catio. That’s what I am calling the area we are using for our cats. You see we have a few cats. I won’t say how many but we do have a few, thanks to a mama cat abondoning them out by our storage shed. I will write all about them real soon.
Here in Arizona we live out in the desert with a lot of wildlife. Wildlife that will get our cats like coyote and wild boars. Also wildlife that our cats will get like Jackrabbits ,lizards, Quail and prairie dogs. ( not to mention the snakes, I hate snakes).

So that said a Catio must be built for outside time with an inside area for shade. We needed something cheap and quick but also something that looks good also.
What we have done is build a partition out of 2x3s and plywood and added a door. This way we will split the patio into two parts. One side is the craft room and the other side is the Catio. What we have done is something that can be removed fairly easy.
If we were sure we wouldn’t be moving again we would want to insulate this and finish it off a bit more. If we were to sell we need it to come down so we could stage it properly. I have a page all about how to home stage your house to sell. It is a great way to get more money from your house.
I can’t wait to get started showing you what we have done.
Wall Build
We started off with building the partition first. There are three sliding patio doors in this area. What we can figure out is that the previous owners enclosed the patio that expanded the whole back of the house. There is this great space off of the master bedroom that we believe was part of the patio at one time. They then enclosed the rest of the patio off like I explained earlier with 3 patio doors. Two of the doors are one one side of a column and the other one is on the other side of the column.
We made the decision to put the partition at the edge of the column splitting it up with one door on the catio side and two doors on the craft room side. This really was the only place to put it.

As you can see in the above picture the wall was built by putting a 2×3 going across the bottom attached to the floor leaving a space for a door. We attached it with heavy duty construction glue. Then we attached another 2×3 to the ceiling with screws. The next step was putting the studs on the ends and in between. It’s kind of like making a big rectangle. We attached all of this with screws.
Once again remember the opening for the door. Depending on the height of your door you might need to make a box like a transom area above the door.
Framing Done
Measuring the wall for the plywood was next. We decided to put it on the craft room side to give it a more rustic look. We used plywood because that’s what we had on hand. Drywall would work also as long as it doesn’t get wet in the area you put it. They also make different kind of wood for outside construction too. We wanted to use what we had because of cost being a factor.

As you can see in the picture we didn’t enclose both sides. This isn’t a climate controlled area so we haven’t gone to that expense and also we are using the studs for a climbing shelf area for the cats. We use a portable air conditioner for when it gets hot.
Plywood is up so don’t forget the door. This is one item that we had to buy. The large building supply stores sell the doors already hung on a frame. It makes installing it so much easier. Just place it into the area it goes and screw it in.

Finishing Touches on Our Patio Makeover
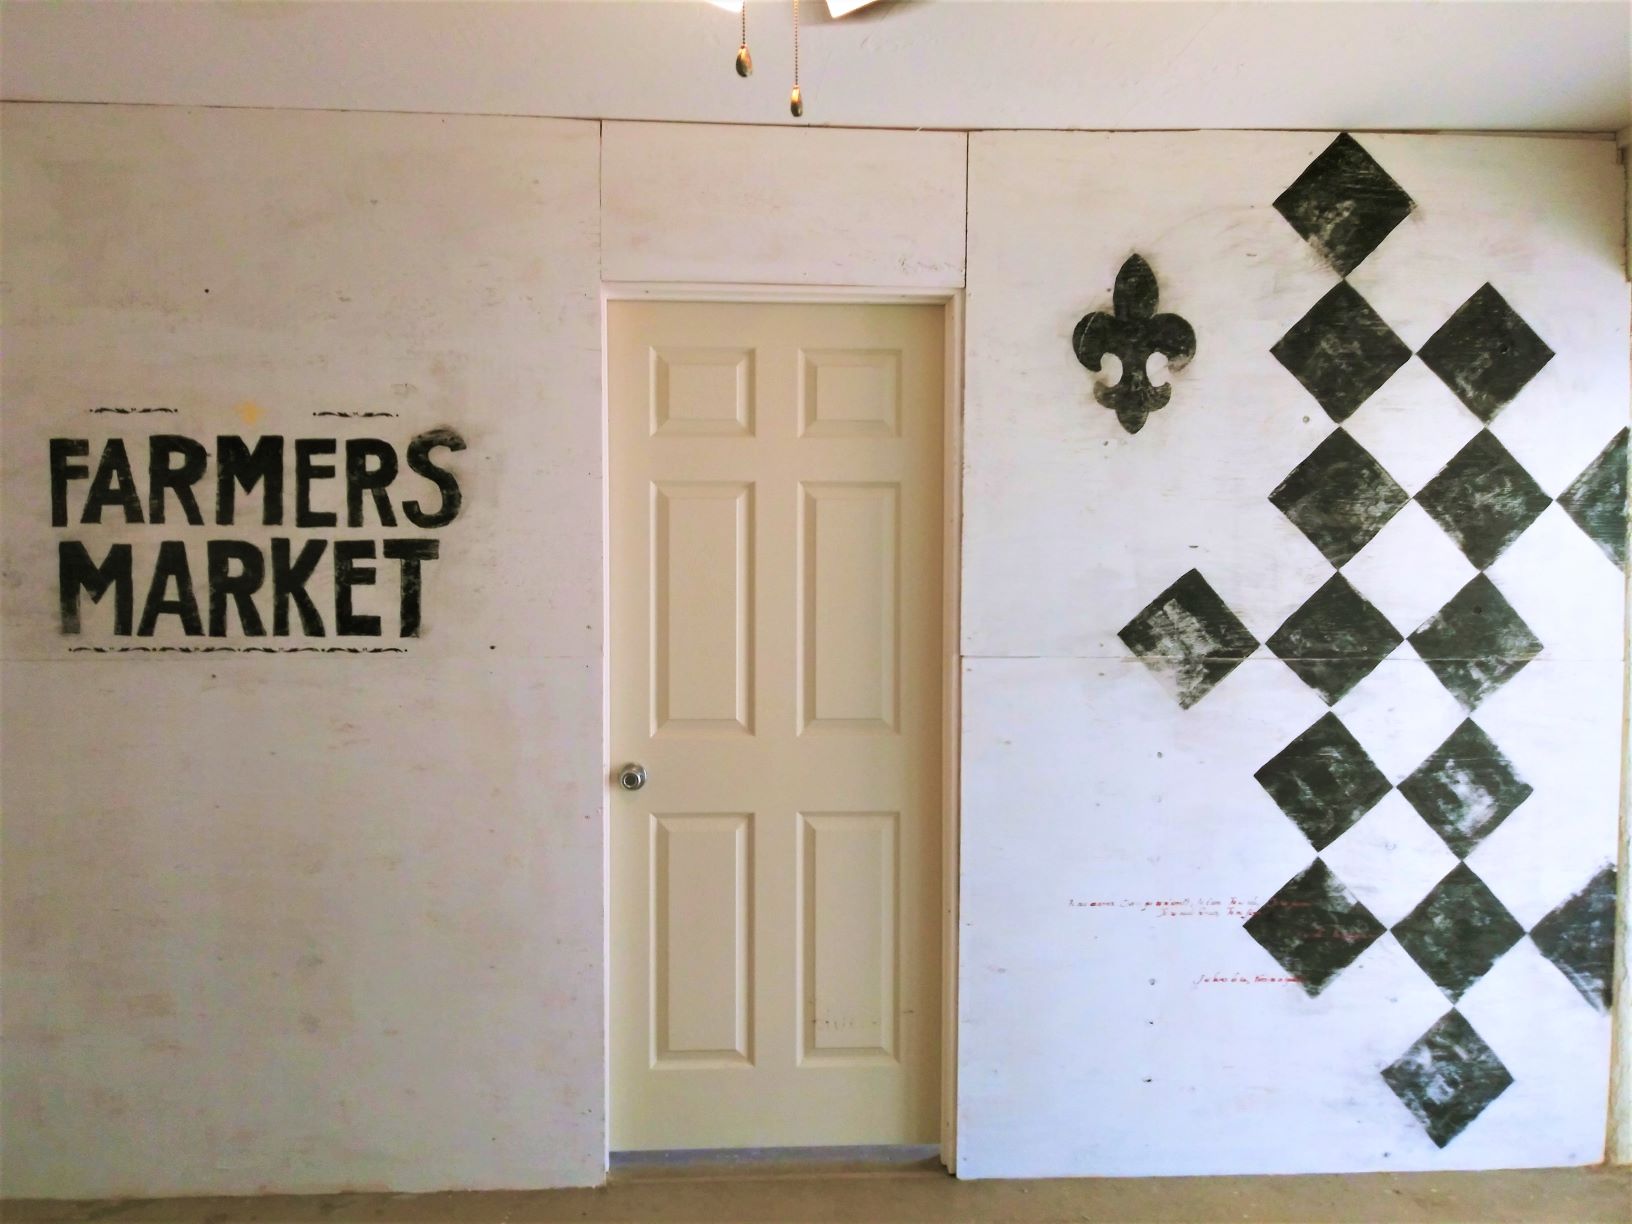
Since this is all we are doing with the partition we need it to look good. Our kitchen and family room windows look directly out on to this area. Like I say in my painting post add paint and it will transform it. So that’s what we have done. We added paint everywhere. On the walls of the partition, repainted the stucco on the outside of the house and to finish it off we even painted the cement floors. The floors are still a work in progress. We are waiting on a stencil that we ordered. A painted rug will go in the center to calm down the white a bit.

We are happy with what we have so far but there will be more finishing touches to our patio makeover.
Like adding cabinets and climbing areas for the cats and yes even more paint. I can’t wait for you to see the actual working spaces once everything is in its place.
Even though everything isn’t totally finished the cats are sure liking there new room with the addition of a screened in outside area. I will be writing a post on how we did that soon.
As soon as we finish up with our other finishes I will add more pictures.
Patio Makeover Update
We finished the patio to catio makeover and I failed to get good pictures of the finished product before we put the cats in. Once you get the cats in well as you probably know the cats make it their own and it doesn’t look picture perfect. I will post a few pictures with the cats already in it pics.
That being said and done. It worked out great but we already have made another outdoor area with a cooled indoor area for them out in our back yard. This was done so they would have more space to run and play. They love it. They have dirt to dig and play in, places to climb and a cool place to hang out.

I repainted the room and moved the craft room to this side because it is attached to my indoor sitting room. Made more sense.

See you soon.